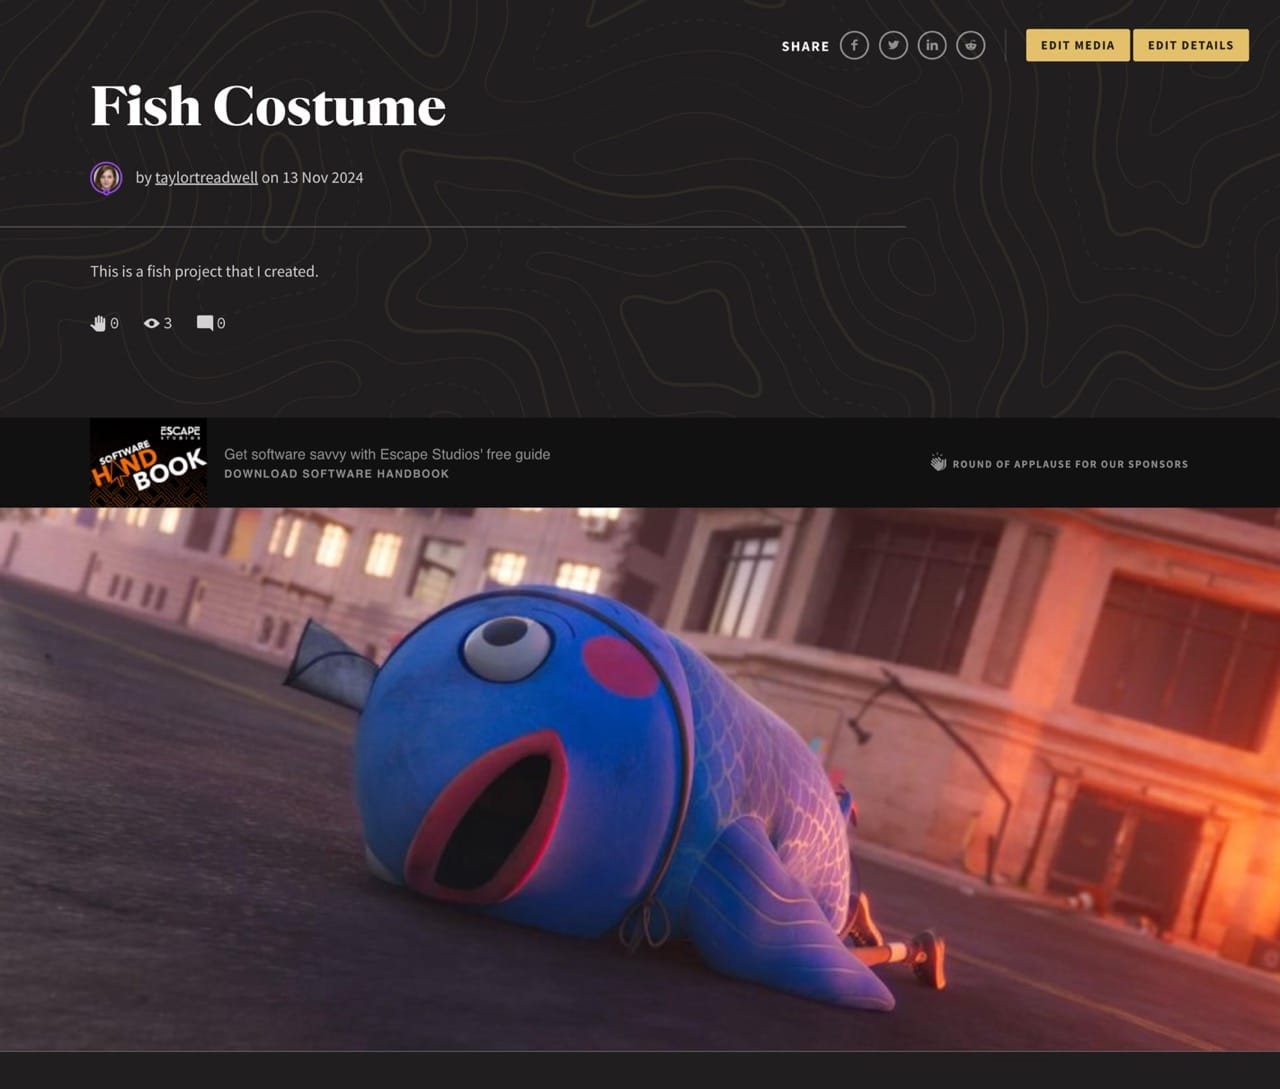
Uploading Your Work
Our proprietary Page Builder is an incredible tool that allows you to create fully customised pages showcasing your work. Whether you’re sharing static images, videos, or interactive 3D models, this builder helps you bring your projects to life. This guide will walk you through every step of the process, directly reflecting the detailed steps covered in the demonstration video.
To begin, click the "+ New Project" button located in the main navigation along the top of each page, or simply click button below.
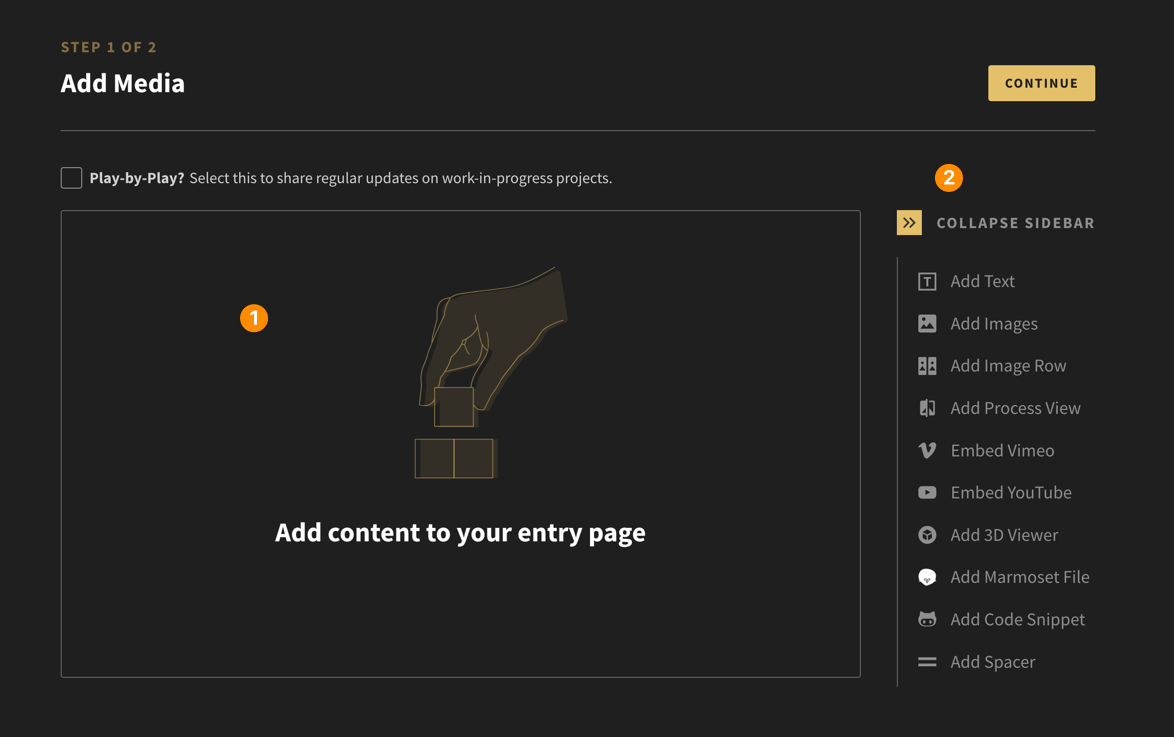
This will open the Page Builder. Its split into two main sections:
- Content Area: Displays all the media and text for your page.
- Sidebar Menu: Listing all the available media widgets you can use.
Step 1: Adding Media
The first step in creating your project page is to add media widgets. The Page Builder offers a variety of widgets that you can use to display your work, such as image galleries, videos, 3D files, and text blocks.
Adding Images
In this quick example, we are going to start by uploading a simple image. On the right-hand side of the page builder, you’ll see a menu of available widgets.
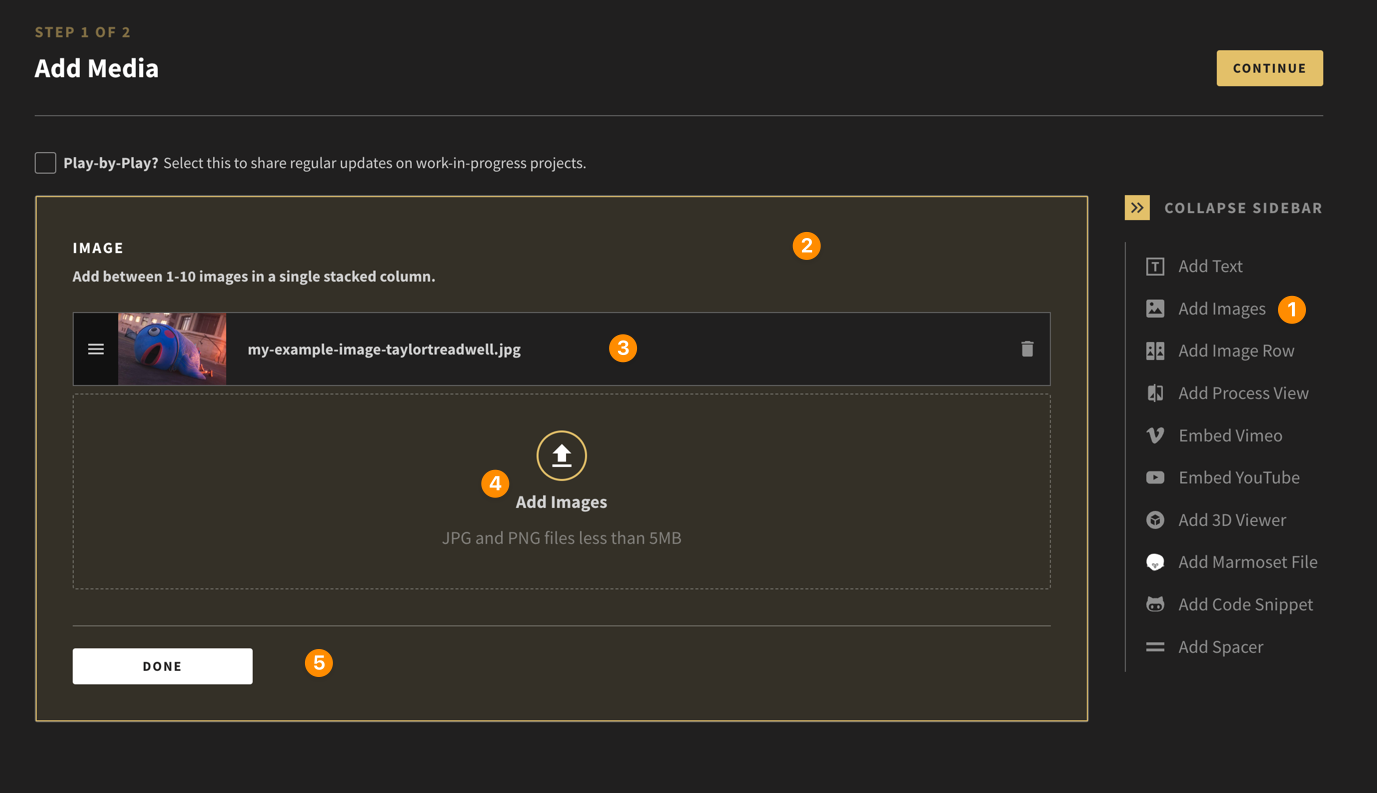
- Click Add Images
- This will load the Image widget into the Content Area of the page. You can choose to drag an image into the widget area, or click the widget to open a local file browser window.
- Once the image(s) are loaded, they will appear as a list inside the widget. If there are multiple images, you can use the "three lines" icon on the left to drag and re-order your images. You can use the "bin" icon on the right, to delete the image.
- You can add up-to 10 images in each widget. They will be stacked one on top of each other on the page.
- When you are happy, simply click Done. The page will load and show you the image(s) in the content area.
Widget Controls
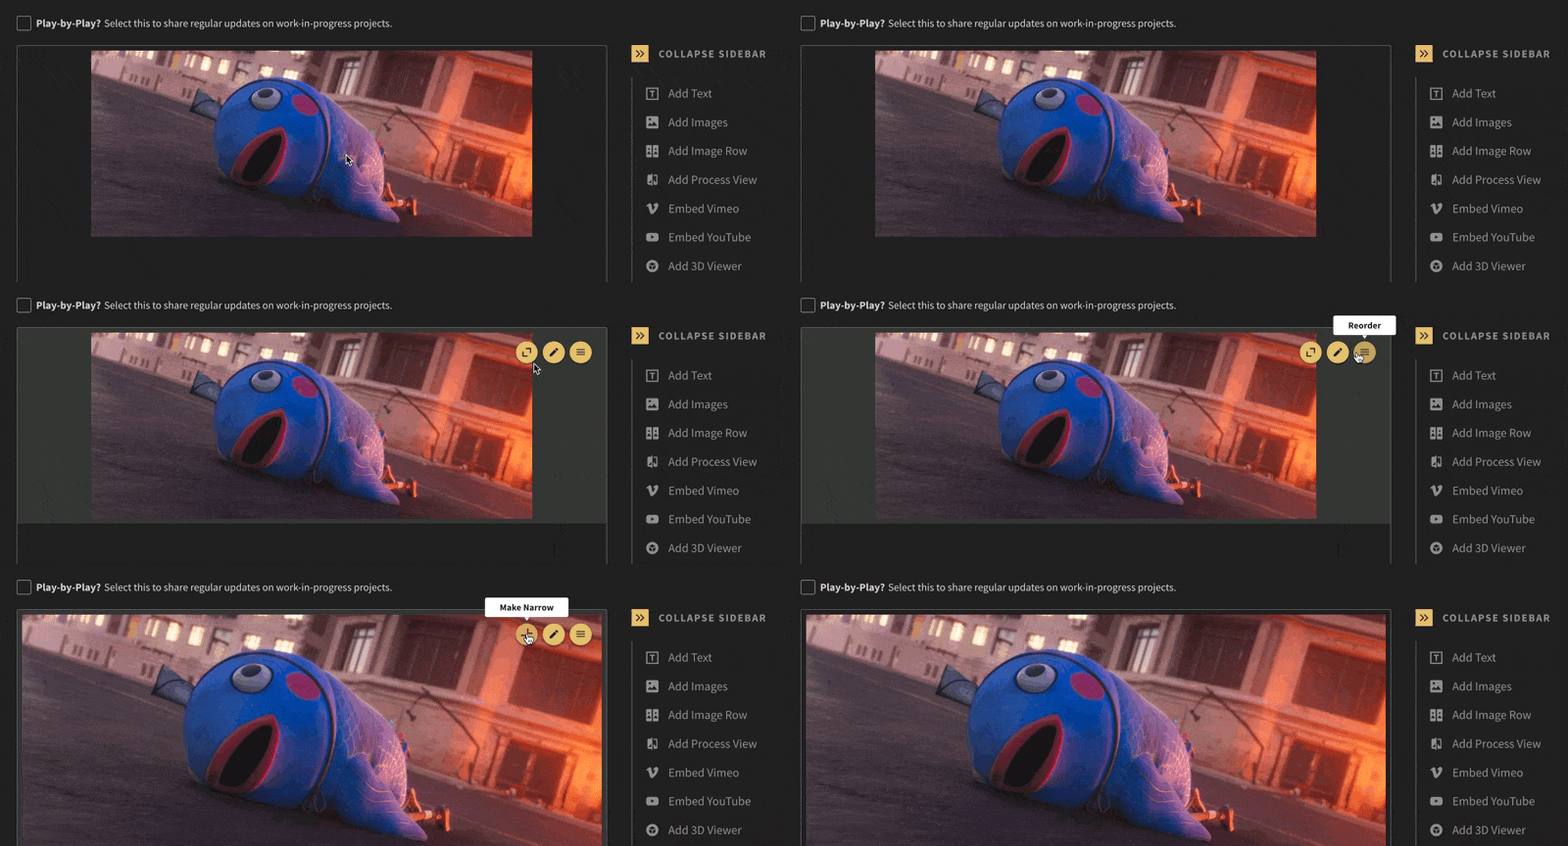
Once you've added a widget, you can quickly access controls by hovering your mouse over it. In the example below, you can see that the following controls become available for the image widget:
- Make Full-Width: This will set the image width to the full-width of the page. The standard width is much narrower.
- Edit: Allows you to access the files you uploaded. You can then delete or reorder the internal assets
- Reorder: This allows you to reorder all the widgets on the page.
Organising Your Media
Once uploaded, arrange your media to create a logical flow that tells the story of your project. Drag and drop images and videos to reorder them as needed. Use this opportunity to ensure the most impactful elements are presented first.
When you are happy with how your page looks, simply click the Continue button located along the top of the Page Builder to proceed to next step.
Step 2: Project Details
The next step is where you can add information about your project. To get started, we recommend you Add Featured Thumbnail.
This image has two main purposes:
- used as a visual identifier on your project card. This is displayed on your profile and also in the main project search area.
- it is also used as a full-width cover image along the top of your project page (this is optional).
We recommend uploading an JPG image at least 1920px x 1440px.
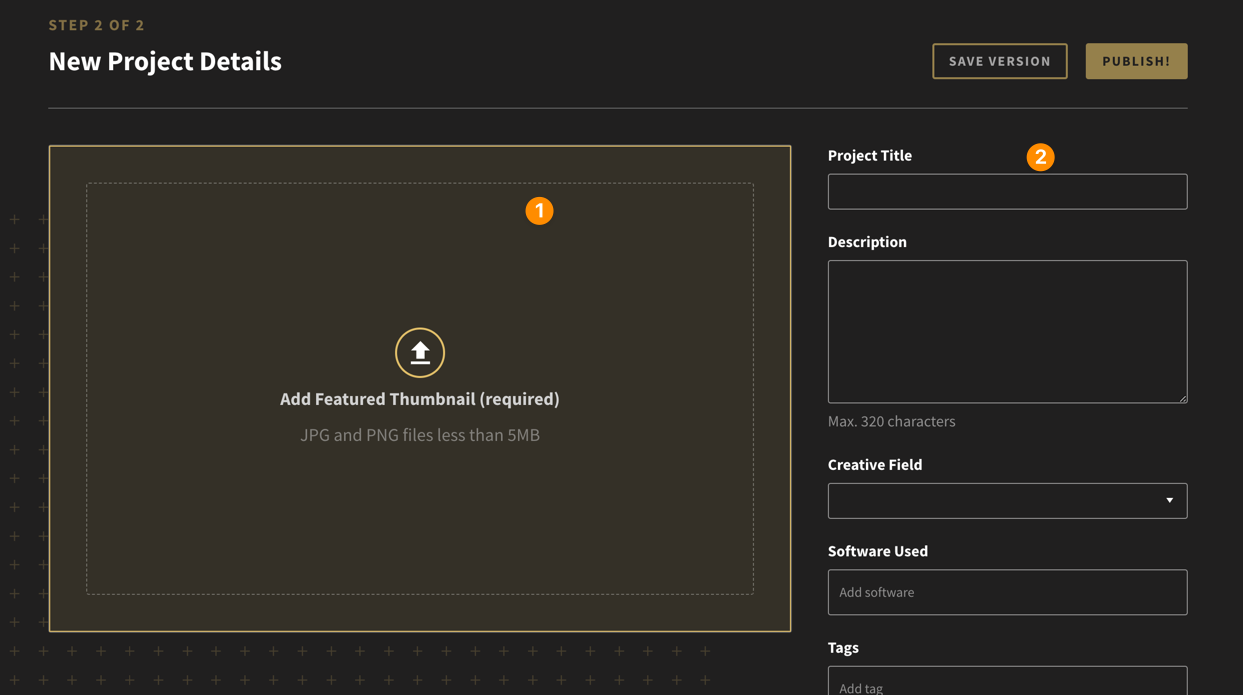
To add your Featured Images, simply drag the image into the viewer, or click to use your file browser. You can then use the Crop tool to control how the final image will look. Use the slider along the bottom to zoom, and then click Done when happy with the results.

Adding Details
It's important to include as much helpful information about your project as possible so more people can find it. The sidebar menu has the following form fields available:
- Project Title: Simple name that best represents the content you have shared.
- Description: This description will appear at the top of your project.
- Creative Fields: This helps our search engine know what to share with other members.
- Software Used: You can add tags for the software that was used to create the project. Add them one-by-one, and don't go overboard!
- Tags: These are other ways to help people find your work eg: automobile, character, landscape.
- Collaborators: If this was a team project, you can add other members of the community to the project. If they accept, the project will appear on their profile page.
- Cover Image?: Tick this checkbox if you would like your Featured Thumbnail image to appear at the top of the project page.
- Adult Content?: If your project has adult themes, please tick this checkbox so that it's only displayed to members who are open to this content.
Once you have completed the fields, click Publish! You will be redirected to your live project page.
