What is a Play-by-Play Project?
A Play by Play project is the ultimate way to document and share your creative journey. Formerly known as “Work in Progress,” this feature allows you to showcase the evolution of your work, highlighting the steps, challenges, and breakthroughs along the way. It’s designed to go beyond the final product, giving your audience insight into your process.
Why Use Play by Play?
Showcase Your Process: Share each stage of your project, from initial ideas to the polished outcome, and let others appreciate the effort behind your work.
Gather Feedback: Gain valuable insights and suggestions from the community to improve your project as you go.
Build Engagement: Keep your audience excited with regular updates. This can attract collaborators, followers, and even recruiters.
Highlight Growth: Demonstrate how you tackle challenges, making your work relatable and inspiring to others.

How Play by Play Differs from Standard Projects
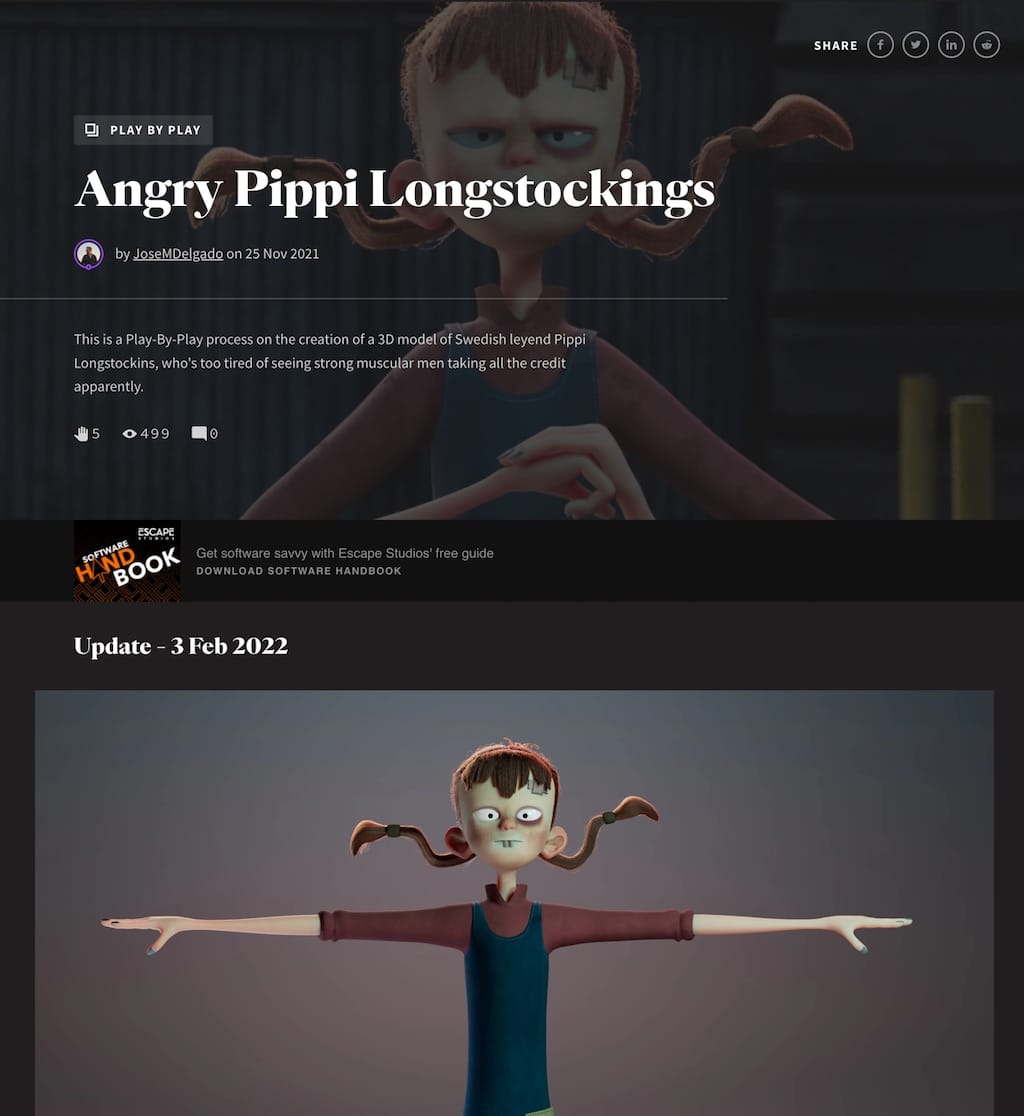
Each time you add an update to a Play by Play project, a new section is created on your project page with a date stamp, preserving the full history of your progress.
This means anyone can see how your work has evolved over time. When you post a new update, older updates and their comments are locked down, keeping the focus on your latest progress.
Play by Play projects also include a special tag above the project title, making it clear that your work is all about the process, not just the final result.
How to Create a Play by Play Project
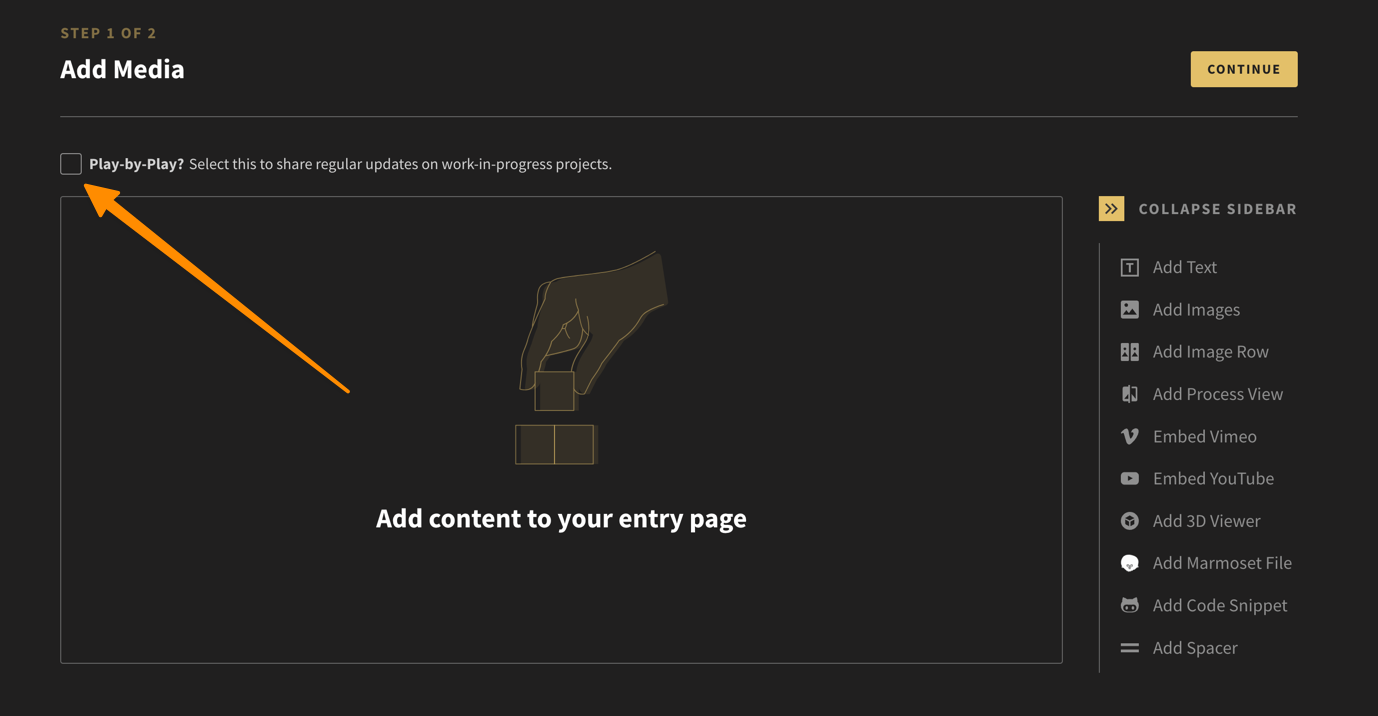
When you create a new project, you will notice a small checkbox along the top of the Page Builder content area.

- To activate the Play-by-Play option, simple tick the checkbox
- Upload your media and fill in the project details as usual.
- Publish your project.
Adding New Updates to Your Project
Once published, you’ll see a + Add Update button in the top-right corner of your project page. This allows you to add new updates whenever you’re ready.
- Click the + Add Update button on your project page.
- Use the project builder to upload new media and descriptions.
- Proceed through the steps and publish your update.
Each update will appear as a new section on your project page, showing your latest progress while preserving earlier updates.
How to Edit an Update
There might come a time when you realise you need to edit an update. To do this, simply scroll down your page to the update.
- Click the Edit Update button located at the top right of the section.
- Use the project builder to make the necessary changes.
- Publish your update.